Recently, I’ve been focusing on finding the perfect balance between modern technology and traditional metalsmithing techniques, and this fabulous commission project is a great example of this method paying off. When a client came to me with a collection of heirloom pieces all featuring stones of different shapes and sizes, I knew this was an opportunity to flex my CAD muscles and create something contemporary and sentimental.
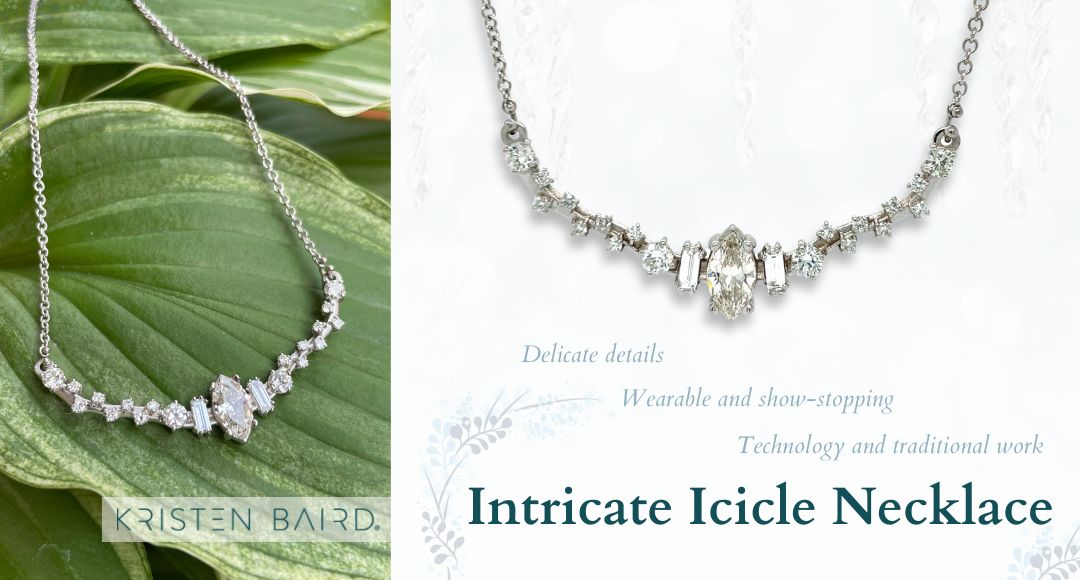
The result was an elegant, intricate necklace that is more than the sum of its parts (and there are many, many, parts!)
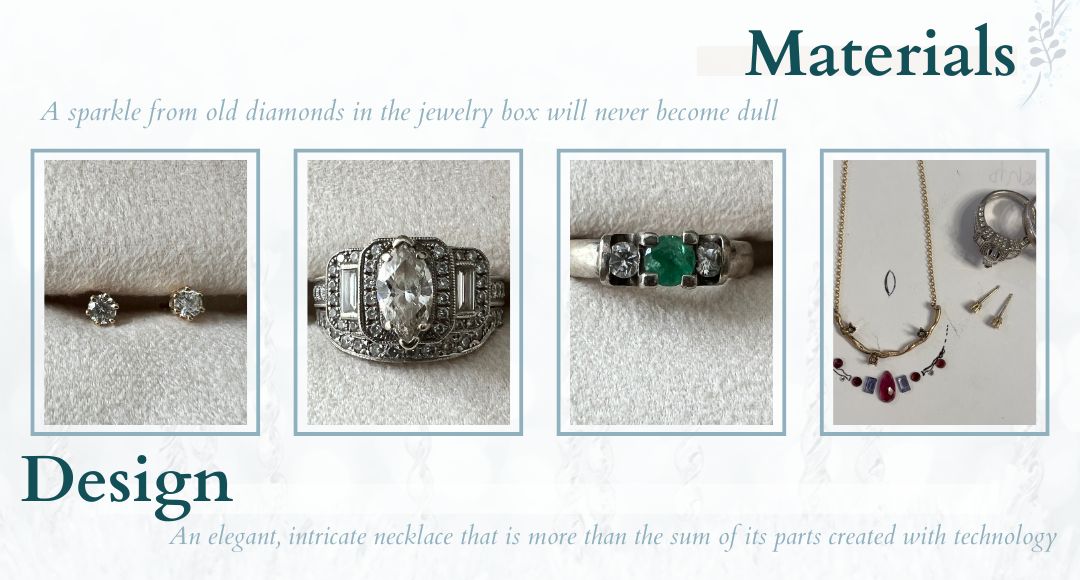
The Materials

We started off with the client’s original marquise diamond. She had reset it into a ring with two baguettes and many tiny diamonds. (This client loves bling… and we are in complete agreement about that!) She also had a small ring with two medium-sized diamonds and a pair of diamond stud earrings.
Her goal: get as many diamonds as possible onto a petite necklace that would sit at the base of her neck.
Challenge accepted!
The Inspiration
There were two main pieces of inspiration for this design. The first was my Alexandrite Graduation commission project from years ago. The second was the client’s wedding ring. She had recently upgraded her wedding set for her 40th anniversary (congrats!!) and she wanted something that would showcase her original stone while complimenting the new ring.
This meant that the new piece would have to be as dainty and petite as the Alexandrite Graduation but with a lot more sparkle and intricate details. Like a melting icicle sparkling in the sunlight, this necklace was going to twinkle from every direction. I knew that this was going to be a job for CAD.
The CAD Design

CAD, or Computer-Aided Design, is a process that allows you to input design data down to the 100th of a millimeter. For example, if a stone is, 2.02mm around and 1.53mm deep, you can plug that number into the computer and get a scale model of exactly that stone. This is helpful when you’re dealing with a lot of complex relationships between stones and pieces of different sizes and you want to make sure everything fits together perfectly.
In this piece specifically, I knew there were going to be places where there was as little as 1/10th of a millimeter between parts with everything evenly spaced. The client also wanted the necklace to be symmetrical, but still have movement and flow. CAD allowed me to zoom way in and make sure each stone would be placed perfectly.
CAD also allowed me to get an extremely accurate rendering of the piece that I could print out to scale. This digital representation was much more specific than anything I could sketch myself. For clients who want a preview of the product, CAD is a great tool.
Finally, CAD allows me to save design concepts for the future so I can easily tinker with and modify them, creating endless possibilities.
The Handcrafting

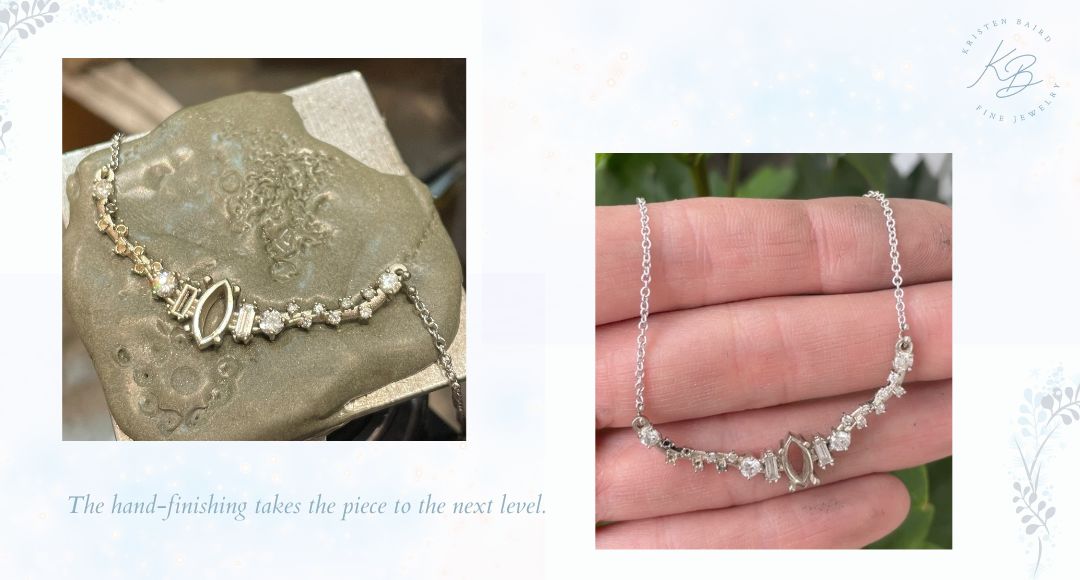
After the CAD design was finished and the necklace was cast in 18K white gold, it was time for the handcrafted portion of the commission. I always tell clients that, while CAD is great, it’s the hand-finishing that takes the piece to the next level.
I set each of the 21 diamonds by hand right here in my studio. Because every stone was a different size, it was a very intricate and time-consuming process. But it was so worth it in the end!
Once the stones were set, it was time to clean, polish, and add those final touches that I’m known for, such as the Crescent Connection. Finally… the final piece was finished and ready to be delivered!
The Final Product
Check out that ice! I’m truly obsessed with the delicate details on this necklace. It’s both wearable every day and show-stopping, exactly what I was going for. Once more, I feel like I’m coming into my own with the combination between technology and traditional work. The best pieces will utilize both methods, and this is a great example of what’s possible when the two techniques are combined.
I’m so glad that the client loves the piece as much as I do. I hope she enjoys sparkling every day!

